Managing Lookup Lists
Lookup Lists are extremely helpful when you want to maintain a longer list of responses that can be used on multiple questions within the same form, or in multiple CCBs within or even outside of your initiative’s Site Collection.
For example, if you have the same list of 25 names or counties or organizations that you want to include as responses to more than one question, a Lookup List allows you to maintain the list in one place. If you update (add, delete, modify) values on the list, you do it once within the list, and anywhere that list is used for responses, it will update automatically.
Note: Lookup Lists are integrated within the CCB system now and are no longer tied to SharePoint custom lists or SharePoint WorkStations.
One of the improvements in having Lookup Lists maintained within the CCB is they can now be used by all initiatives systemwide. This is helpful if more than one CCB collection would like to have (for example) the full list of counties for the state of Kansas as responses to a “county” question on your Accomplishment form.
Warning: All users should be careful about deleting or modifying existing responses on a Lookup List, since doing this will not update historical data, and it could cause issues with existing graphs and saved filtered views. If you want to add a new response on a Lookup List, it will not affect your historical data, but keep in mind that everywhere the list is used, the new response will appear.
Creating a Lookup List
Section titled “Creating a Lookup List”-
Navigate to the CCB Site Administration page and select Manage Lookups from the toolbar.
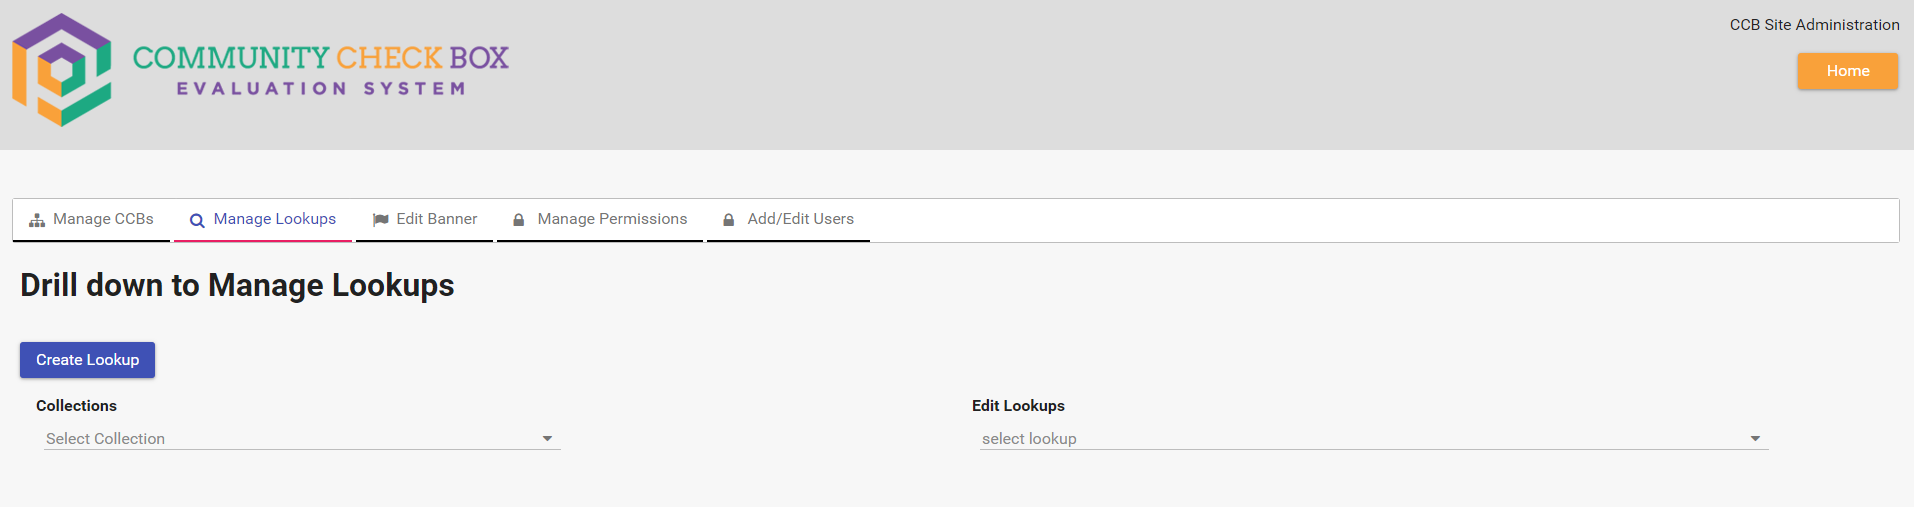
(Click the image above to enlarge.)
-
Click Create Lookup.

-
Give your Lookup List a descriptive title that helps anyone in the CCB system understand what it is and how it’s being used.
Example: Avoid calling your list “Your Name - Lookup” without indicating where it’s intended to be used. If you’re creating the list as responses for the “Your Name” question on a CCB form for ThrYve, then call it “ThrYve Name - Lookup” or “ThrYve - Your Name Lookup.” This will tell Site Admins/Owners the origin of the list.
-
After you’ve given your list a title and saved it, you can then Edit Lookup Values.
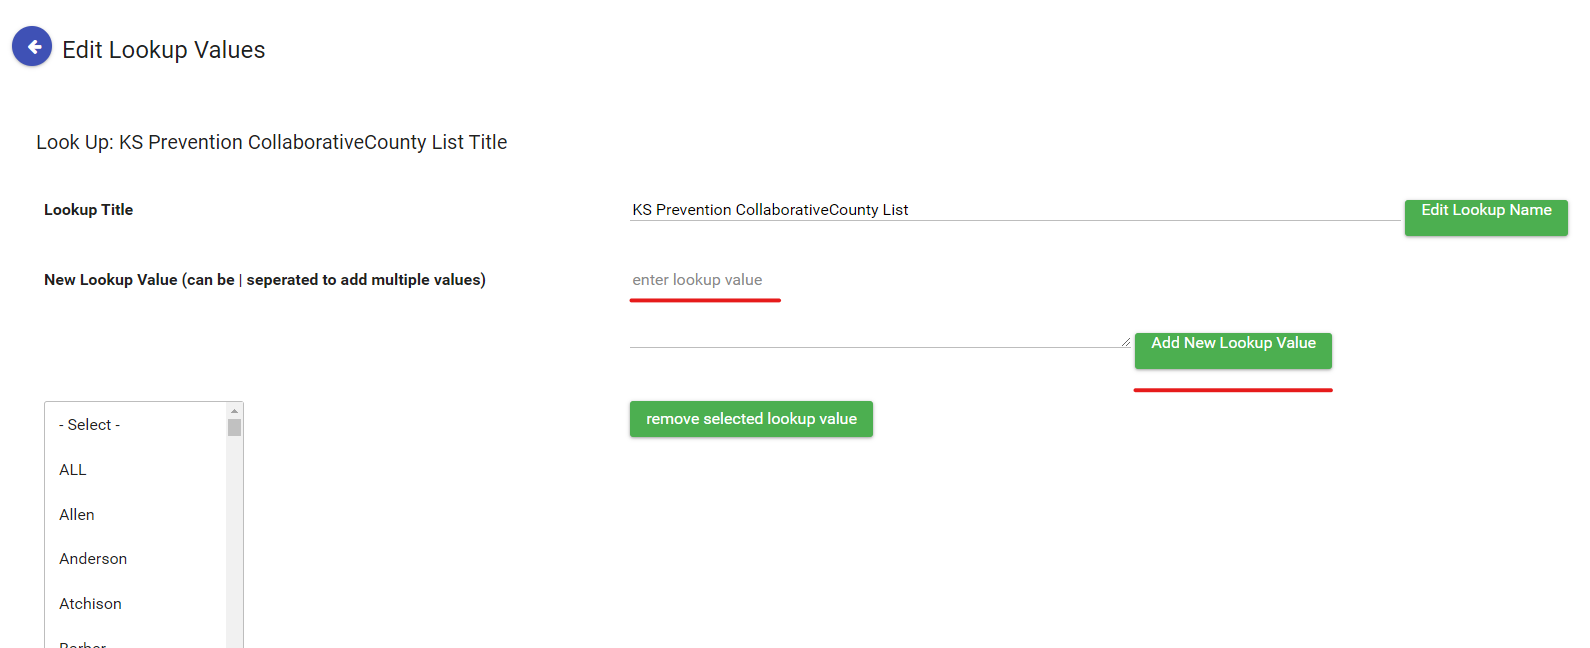
(Click image above to enlarge.)
-
You can add single values/responses by typing them into the blank space where it says “enter lookup value,” then clicking the green button that says “Add New Lookup Value.” Scroll through the existing values first to see if the response is already there.
-
You can also add multiple values at the same time — just separate them with a pipe ”|” the same way values/responses are added to the Accomplishment form.
Note: Make sure there are no spaces on either side of the pipe delimiter, since this will cause graphing and calculation issues. The pipe comes right after the last visible character in the first response and directly before the next response (no spaces on either side).
-
If you need to remove/delete an existing value, select the value from the scrolling list, then click the green button that says “remove selected lookup value.”
Note: Removing values may affect existing graphs and saved views. It will not affect historical data, but you would need to export data to Excel to access past entries with deleted values.
Adding a Lookup List to a CCB Form
Section titled “Adding a Lookup List to a CCB Form”-
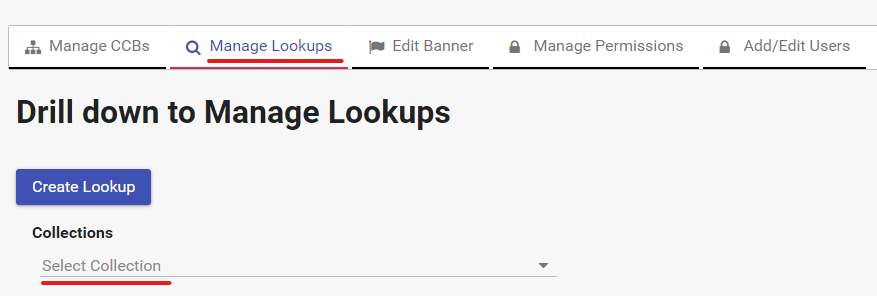
Navigate to the CCB Site Administration page and select Manage Lookups from the toolbar.
-
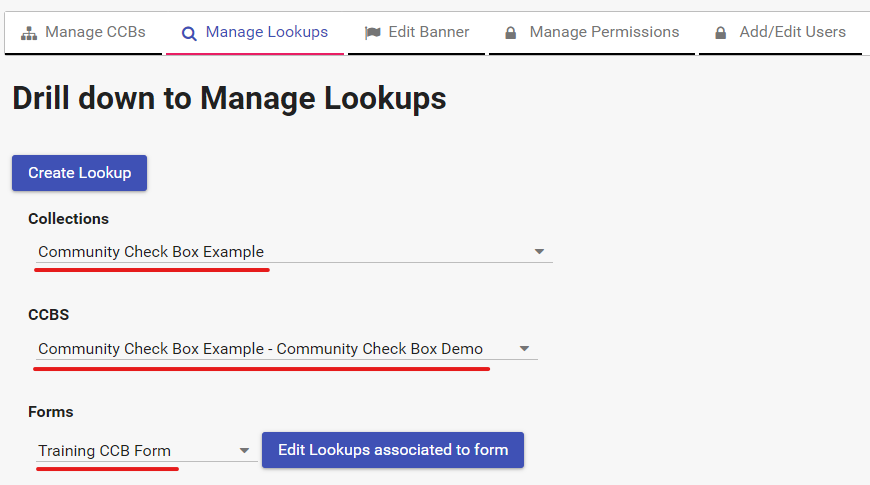
Below the Create Lookup button, select the Site Collection you want to manage from the dropdown list under Collections.
-
Additional dropdowns will appear to select the specific CCB and the specific Form.
-
After you have selected the Site Collection, CCB, and Form, click Edit Lookups associated to form.
-
You will see a two-columned Edit Lookup page:
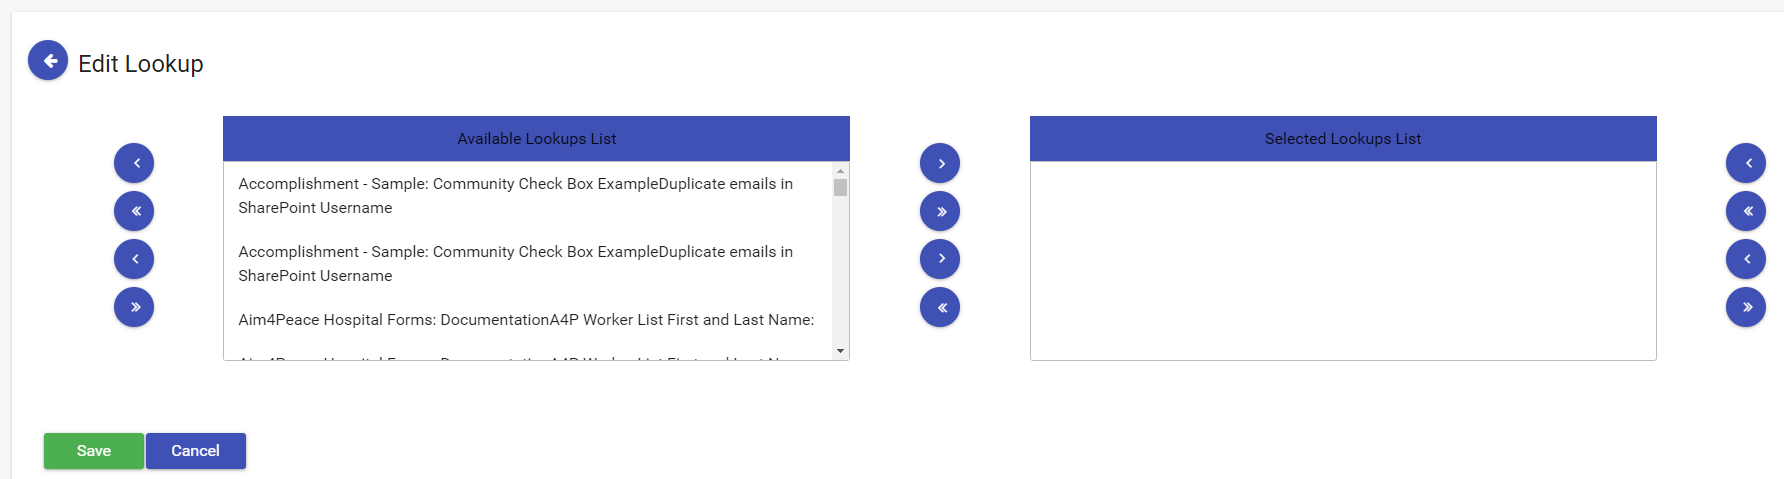
(Click the image above to enlarge.)
- The left column contains all existing Lookup Lists systemwide, showing the source CCB name followed by the list name.
- The right column displays any Lookup Lists already added to the form.
-
To add a Lookup List, select it by name in the left column, then click the forward arrow ”>” to move it to the right column.
-
Repeat for additional Lookup Lists.
-
Click Save.
-
You can now create a question on your form that uses the Lookup List(s) as answers/responses.
Granting Lookup Admin Access
Section titled “Granting Lookup Admin Access”Any user can be given access to the Lookup Admin panel, which allows them to view and add lookup values without full Site Admin access. This is useful for team members who need to keep lookup lists current (e.g., adding new staff names or organization names).
To grant a user the Lookup Admin role, assign them the Lookup Admin permission in the site’s roles and permissions settings. Once assigned, the user will see the “Lookup Admin” menu item in their left navigation bar.
Using the Lookup Admin Panel
Section titled “Using the Lookup Admin Panel”Note: The Lookup Admin panel is available to any user — Site Admins can grant the Lookup Admin role to anyone. It does not require full admin access.
The Lookup Admin panel provides a streamlined way to manage lookup values directly within your CCB, without needing to access the full Site Administration page.
Getting Access
Section titled “Getting Access”The Lookup Admin menu item appears in the left navigation bar once your Site Admin has enabled the permission for you.
Roles that include Lookup Admin access:
- Lookup Admin — A specialized role specifically for managing lookup values
- Site Admin — Full site administration access (includes lookup management)
- System Admin — System-wide administration access
If you do not see “Lookup Admin” in your navigation menu, contact your Site Admin to request the Lookup Admin role.
Selecting a Lookup to Manage
Section titled “Selecting a Lookup to Manage”- Click Lookup Admin in the left navigation menu.
- On the Lookup Admin page, you will see a dropdown labeled “Lookups Associated with this CCB”.
- Select the lookup you want to manage from the dropdown. Each option shows the list name and field title to help you identify the correct lookup.
Viewing Existing Values
Section titled “Viewing Existing Values”After selecting a lookup, the right side of the page displays the Existing Lookup Values — an alphabetically sorted list of all current values for that lookup. You can scroll through this list to review what’s already available.
Viewing Form Associations
Section titled “Viewing Form Associations”When you select a lookup, the page also shows which forms currently use that lookup. This appears as a list under a warning message:
“Additions to lookup lists will appear on all associated forms.”
Each form is listed with its parent CCB name and form name (e.g., “My Organization - Accomplishment Form”). This helps you understand the scope of any changes you make.
Adding New Values
Section titled “Adding New Values”- Select the lookup you want to update from the dropdown.
- Type the new value in the “Add New Lookup Value” text field.
- Click Submit.
Adding multiple values at once: You can add multiple values in a single submission by separating them with the pipe character (|). For example, entering Active|Inactive|Pending will add three separate values.
Important: Make sure there are no spaces on either side of the pipe delimiter, since this will cause graphing and calculation issues. The pipe comes right after the last visible character in the first value and directly before the next value (no spaces on either side).
Validation rules:
- Duplicate check: The system will warn you if a value already exists in the list.
- Character limit: Individual values must be 254 characters or fewer.
- Trimming: Leading and trailing spaces are automatically removed from values.
- Partial duplicates: If you submit multiple pipe-separated values and some already exist, the system will add the new ones and warn you about the duplicates.
Important: Changes take effect immediately. New values will appear in the dropdown options on all forms that use this lookup the next time users load those forms. There is no approval workflow — values are live as soon as they are submitted.
Lookup Admin vs. Site Admin Capabilities
Section titled “Lookup Admin vs. Site Admin Capabilities”| Capability | Lookup Admin | Site Admin |
|---|---|---|
| View lookup values | Yes | Yes |
| Add new lookup values | Yes | Yes |
| View form associations | Yes | Yes |
| Create new lookups | No | Yes |
| Edit lookup names | No | Yes |
| Delete lookup values | No | Yes |
| Manage forms and fields | No | Yes |
| Access Site Settings | No | Yes |
| Access all Administration features | No | Yes |
The Lookup Admin role is ideal for team members who need to keep lookup lists current (e.g., adding new staff names or organization names) without the responsibility of full site administration.