Managing Participants Description (Admin)
Admin Only: These instructions are for Site Owners/Admins.
Video Tutorial
Section titled “Video Tutorial”Participants Description Overview
Section titled “Participants Description Overview”Adding Participants Description (PD) data to Accomplishments captures more detailed information (at an aggregate level, not an individual level) about the people being served by your initiative. For example, you can track demographic data such as the number served by age, gender, or race, as well as geographic data by Zip Code, city, or county, in addition to the total number served and total new participants.
As a Site Owner/Admin, the Types, Options, and Choices for your Participants Description are first created and then maintained in the Administration section of your Community Check Box (CCB).
Information about entering PD data at the Member/User level can be found at Working with Participants Description Data.
Enabling Participants Description
Section titled “Enabling Participants Description”Before you can collect PD data, you must enable that function on an Accomplishments form.
- Go to Administration > Accomplishment Forms in the left navigation bar.
- Click once on the specific Accomplishment Form.
- Click on Edit.
- Enable Participant Description by sliding the toggle to the right.
- Click Save.
Setting Up Participants Description
Section titled “Setting Up Participants Description”After you enable PD Data for the form, you can begin setting up the data Types (e.g., Demographic, Geographic), the Options for each type (e.g., Age, Race or Gender, City, State, or County), and the specific Choices for each Option (e.g., for Age: 65 and over, 21-64, Under 21; for Race: White, Black, Asian, Latino; for State: Kansas, Missouri, Oklahoma, etc.).
-
Go to Administration > Participants Description.
-
Click New.
-
Enter the Type Name (e.g., Demographic or Geographic).
-
Click Save.
-
Select your new PD Type by its name, then Edit.
-
Click + Add at the bottom.
-
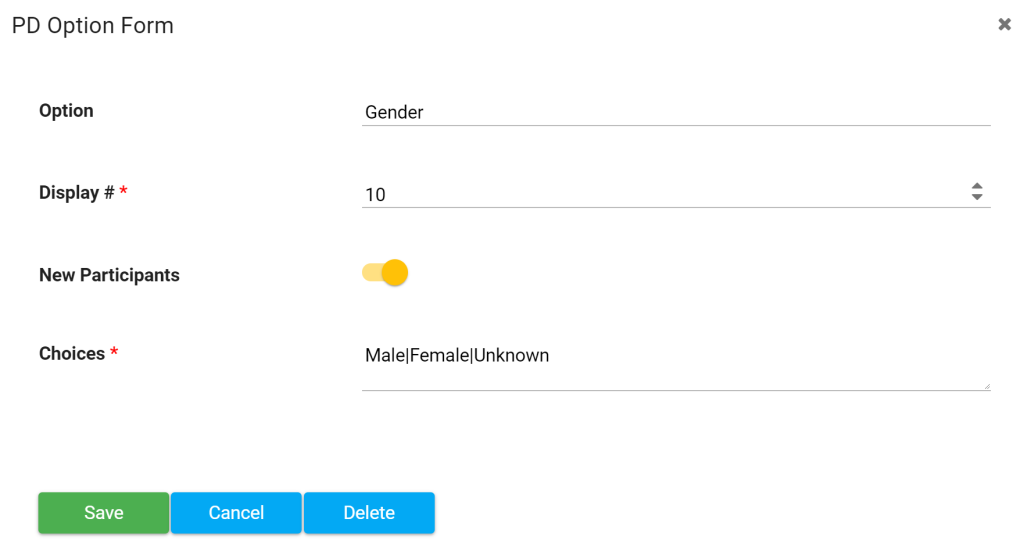
Enter the Option by name (e.g., Gender, Race, Age, or City, State, County, Zip Code).
-
Enter a Display # to order the items (weighted value for listed order).
-
Move the toggle if you want to include New Participants tracking.
-
Add Choices. Be sure to use the pipe symbol ”|” between each choice.
Important: Make sure you do not include any spaces on either side of your choices (e.g.,
Male|Female|Unknown). Spaces will cause graphing and calculation issues. Also, do not include a pipe at the end of the list, or it will create a “blank” option. -
Click Save.
-
Click + Add and repeat the above steps to create all PD fields you need.
-
Click Save to save updates to the Participants Description Type Name.
Editing Participants Description
Section titled “Editing Participants Description”- Go to Administration > Participants Description.
- Select the Type Name you want to edit (e.g., Demographic, Geographic).
- Click Edit.
- Click on the Option you want, and the PD Option Form will pop up.
- Make any edits, then click Save to close the popup.
- Click the top-menu Save button to save updates to the Participants Description.
Administration Section: Participants Description
Section titled “Administration Section: Participants Description”If you would like to track participants data, then Participants Description Enabled needs to be activated under the Administration section.
Create a New Participants Description Type
Section titled “Create a New Participants Description Type”- Go to Administration > Participants Description.
- Enter the Type Name, e.g., Demographic is a type, Geographic is a type.
- Click Save.
- Select the Type Name that you just created, then click Edit.
- Click the Add button, and enter an Option (e.g., Gender, Age, Race/Ethnicity, County, State, Custom).
- Enter a Display # to sort each Option in a weighted order.
- Move the toggle to the right if you want to include New Participants data.
- Enter Choices for the Option (e.g.,
Male|Female|Nonbinary|Unknown), separated by a pipe between each potential response. - Save.